網頁 UIWebView
應用程式中有時如果需要載入一些外部網站時,可以使用 UIWebView ,可以很快速的建立起來。以下是本節的目標,一個超輕量瀏覽器,上方有五個按鈕,功能分別為上一頁、下一頁、重新讀取、取消讀取及前往網址,以及一個網址列與 UIWebView :
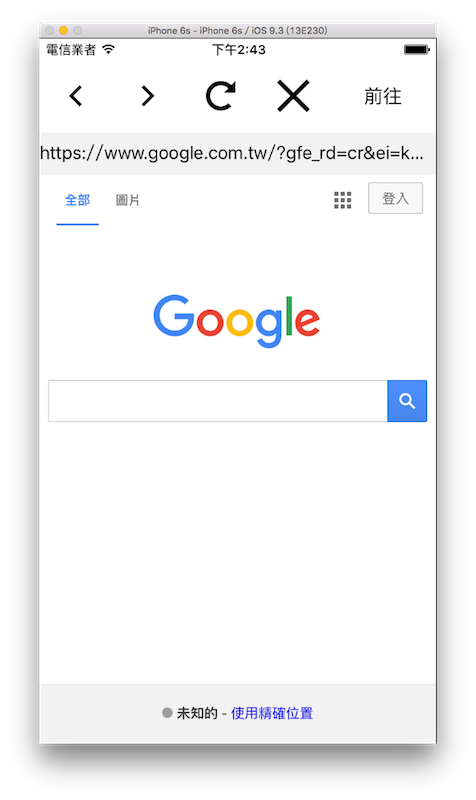
首先在 Xcode 裡,新建一個 Single View Application 類型的專案,取名為 ExUIWebView 。再以加入檔案的方式加入四張按鈕的圖片。
先為ViewController建立三個屬性:
class ViewController: UIViewController {
    var myTextField :UITextField!
    var myWebView :UIWebView!
    var myActivityIndicator:UIActivityIndicatorView!

    // 省略
}
以及在viewDidLoad()中取得螢幕尺寸跟預設尺寸,以供後續使用,如下:
// 取得螢幕的尺寸
let fullScreenSize = UIScreen.mainScreen().bounds.size

// 預設尺寸
let goWidth = 100.0
let actionWidth =
  ( Double(fullScreenSize.width) - goWidth ) / 4
前置作業
一開始先在viewDidLoad()裡建立五個 UIButton 及一個用來輸入網址的 UITextField :
// 建立五個 UIButton
var myButton = UIButton(frame: CGRect(
  x: 0, y: 20,
  width: actionWidth, height: actionWidth))
myButton.setImage(
  UIImage(named: "back")!, forState: .Normal)
myButton.addTarget(
  self,
  action:
    #selector(ViewController.back),
  forControlEvents: .TouchUpInside)
self.view.addSubview(myButton)

myButton = UIButton(frame: CGRect(
  x: actionWidth, y: 20,
  width: actionWidth, height: actionWidth))
myButton.setImage(
  UIImage(named: "forward")!, forState: .Normal)
myButton.addTarget(
  self,
  action:
    #selector(ViewController.forward),
  forControlEvents: .TouchUpInside)
self.view.addSubview(myButton)

myButton = UIButton(frame: CGRect(
  x: actionWidth * 2, y: 20,
  width: actionWidth, height: actionWidth))
myButton.setImage(
  UIImage(named: "refresh")!, forState: .Normal)
myButton.addTarget(
  self,
  action:
    #selector(ViewController.reload),
  forControlEvents: .TouchUpInside)
self.view.addSubview(myButton)

myButton = UIButton(frame: CGRect(
  x: actionWidth * 3, y: 20,
  width: actionWidth, height: actionWidth))
myButton.setImage(
  UIImage(named: "stop")!, forState: .Normal)
myButton.addTarget(
  self,
  action:
    #selector(ViewController.stop),
  forControlEvents: .TouchUpInside)
self.view.addSubview(myButton)

myButton = UIButton(frame: CGRect(
  x: Double(fullScreenSize.width) - goWidth, y: 20,
  width: goWidth, height: actionWidth))
myButton.setTitle("前往", forState: .Normal)
myButton.setTitleColor(
  UIColor.blackColor(), forState: .Normal)
myButton.addTarget(
  self,
  action:
    #selector(ViewController.go),
  forControlEvents: .TouchUpInside)
self.view.addSubview(myButton)

// 建立一個 UITextField 用來輸入網址
myTextField = UITextField(frame: CGRect(
  x: 0, y: 20.0 + CGFloat(actionWidth),
  width: fullScreenSize.width, height: 40))
myTextField.text = "https://www.google.com"
myTextField.backgroundColor = UIColor.init(
  red: 0.95, green: 0.95, blue: 0.95, alpha: 1)
myTextField.clearButtonMode = .WhileEditing
myTextField.returnKeyType = .Go
myTextField.delegate = self
self.view.addSubview(myTextField)
接著設置 UITextField 的委任需要的協定:
class ViewController:
  UIViewController, UITextFieldDelegate {
  // 省略
}
再於ViewController中,將按下按鈕及鍵盤執行動作的方法加入:
func back() {
    // 上一頁
    myWebView.goBack()
}

func forward() {
    // 下一頁
    myWebView.goForward()
}

func reload() {
    // 重新讀取
    myWebView.reload()
}

func stop() {
    // 取消讀取
    myWebView.stopLoading()

    // 隱藏環狀進度條
    myActivityIndicator.stopAnimating()
}

func go() {
    // 隱藏鍵盤
    self.view.endEditing(true)

    // 前往網址
    let url = NSURL(string:myTextField.text!)
    let urlRequest = NSURLRequest(URL: url!)
    myWebView.loadRequest(urlRequest)
}

func textFieldShouldReturn(textField: UITextField) -> Bool {
    self.go()

    return true
}
建立 UIWebView
在viewDidLoad()裡建立 UIWebView 以及讀取網頁時顯示的環狀進度條。在viewDidLoad()的最後先讀取一次網址:
// 建立 UIWebView
myWebView = UIWebView(frame: CGRect(
    x: 0, y: 60.0 + CGFloat(actionWidth),
    width: fullScreenSize.width,
    height:
      fullScreenSize.height - 60
      - CGFloat(actionWidth)))

// 設置委任對象
myWebView.delegate = self

// 加入到畫面中
self.view.addSubview(myWebView)

// 建立環狀進度條
myActivityIndicator = UIActivityIndicatorView(
  activityIndicatorStyle:.Gray)
myActivityIndicator.center = CGPoint(
  x: fullScreenSize.width * 0.5,
  y: fullScreenSize.height * 0.5)
self.view.addSubview(myActivityIndicator);

// 先讀取一次網址
self.go()
為了讓進度條可以顯示及隱藏,必須設定 UIWebView 的委任並實作兩個方法,首先加上委任需要的協定:
class ViewController: UIViewController,
  UITextFieldDelegate, UIWebViewDelegate {
  // 省略
}
兩個委任需要實作的方法,分別是開始讀取網址時執行動作,以及讀取網址完成時執行動作:
func webViewDidStartLoad(webView: UIWebView) {
    // 顯示進度條
    myActivityIndicator.startAnimating()
}

func webViewDidFinishLoad(webView: UIWebView) {
    // 隱藏進度條
    myActivityIndicator.stopAnimating()

    // 更新網址列的內容
    if let currentURL = myWebView.request?.URL!.absoluteString {
        myTextField.text = currentURL
    }
}
以上便為本節範例的內容。
讀取靜態 HTML 原始碼
UIWebView 還有另一個功能,可以讓你讀取 HTML 原始碼並顯示出來,使用loadHTMLString()方法,如下:
// 你也可以設置 HTML 內容到一個常數
// 用來載入一個靜態的網頁內容
let content =
  "<html><body><h1>Hello World !</h1></body></html>"
myWebView.loadHTMLString(content, baseURL: nil)
無法載入 http 的網址
在 iOS 9 之後,應用程式內的 UIWebView 預設為只能載入 https 的網頁(也就是加密過的),如果是普通 http 的網頁會無法開啟,這邊介紹如何設定成可開啟 http 網頁。
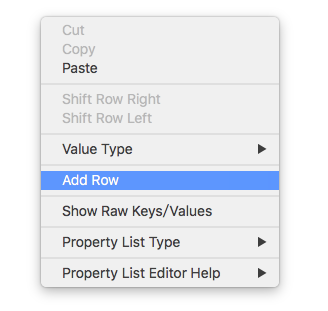
首先在 Xcode 左側專案的檔案列表中,找到 info.plist 並點開,在其內空白處點右鍵,接著按下Add Row,如下圖:
接著他會多出一列,並要你填寫,如下圖:
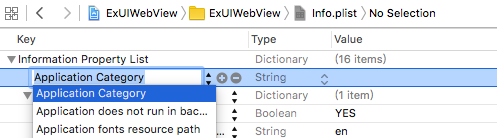
先填入NSAppTransportSecurity,再對剛新增的這列按右鍵點選Add Row,填入NSAllowsArbitraryLoads並設為YES,最後會變成如下圖所示(填入的值會與最後顯示的字不同,請和下圖裡文字比對是否設定正確):

這樣便設定完成,你的 UIWebView 就可以載入 http 網頁了。不過這只是暫緩之計,以長遠來看,還是將所有讀取的網頁都設定為 https 還是比較安全。
圖片來源
- https://www.iconfinder.com/icons/211686/arrow_back_icon
- https://www.iconfinder.com/icons/211688/arrow_forward_icon
- https://www.iconfinder.com/icons/293657/x_icon
- https://www.iconfinder.com/icons/293697/refresh_icon
範例
本節範例程式碼放在 uikit/uiwebview