多頁面
前面章節介紹了許多常用的 UIKit 元件,但都是運作在單一個頁面中(也就是單一個 UIViewController ,前面提到過一個 UIViewController 負責了一個頁面的運作。),這節會介紹如何建立多個頁面,並在這些頁面中切換。
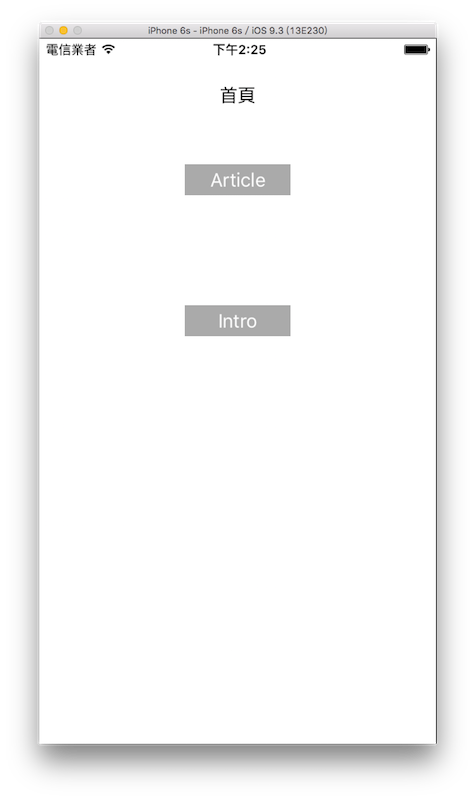
本節的目標如下,建立兩個按鈕,分別會進入不同頁面,兩個頁面都會有回上頁的按鈕, Aritcle 頁裡還會有一個按鈕,可以再進入 Article Detail 頁面:
首先在 Xcode 裡,新建一個 Single View Application 類型的專案,取名為 ExMultiPages 。
一開始先以新增檔案的方式加入三個繼承自 UIViewController 的.swift檔案,分別命名為IntroViewController、ArticleViewController及ArticleDetailViewController。
將上述三個 UIViewController 與ViewController都分別在各自的viewDidLoad()中取得螢幕尺寸及設置底色,以供後續使用,如下:
// 取得螢幕的尺寸
let fullSize = UIScreen.mainScreen().bounds.size

// 設置底色
self.view.backgroundColor = UIColor.whiteColor()
切換頁面
首先在ViewController的viewDidLoad()裡建立一個作為標題的 UILabel 與兩個切換頁面用的 UIButton :
// 頁面標題
let myLabel = UILabel(frame: CGRect(
  x: 0, y: 0, width: fullSize.width, height: 40))
myLabel.center = CGPoint(
  x: fullSize.width * 0.5, y: fullSize.height * 0.08)
myLabel.textAlignment = .Center
myLabel.text = "首頁"
self.view.addSubview(myLabel)

// 建立前往 Article 頁面的 UIButton
var myButton = UIButton(frame: CGRect(
  x: 0, y: 0, width: 100, height: 30))
myButton.setTitle("Article", forState: .Normal)
myButton.backgroundColor = UIColor.lightGrayColor()
myButton.addTarget(
  nil, action: #selector(ViewController.goArticle),
  forControlEvents: .TouchUpInside)
myButton.center = CGPoint(
  x: fullSize.width * 0.5, y: fullSize.height * 0.2)
self.view.addSubview(myButton)

// 建立前往 Intro 頁面的 UIButton
myButton = UIButton(frame: CGRect(
  x: 0, y: 0, width: 100, height: 30))
myButton.setTitle("Intro", forState: .Normal)
myButton.backgroundColor = UIColor.lightGrayColor()
myButton.addTarget(nil,
  action: #selector(ViewController.goIntro),
  forControlEvents: .TouchUpInside)
myButton.center = CGPoint(
  x: fullSize.width * 0.5, y: fullSize.height * 0.4)
self.view.addSubview(myButton)
以及在ViewController加上按下按鈕執行動作的方法:
func goArticle() {
    self.presentViewController(ArticleViewController(), animated: true, completion: nil)
}

func goIntro() {
    self.presentViewController(IntroViewController(), animated: true, completion: nil)
}
上述程式可以看到,切換頁面主要是使用self的方法presentViewController(viewControllerToPresent:, animated:, completion:),參數分別為:
- viewControllerToPresent:要切換前往的頁面,也就是要交棒給予的 UIViewController ,所以上面兩個按鈕按下後就分別前往
ArticleViewController()及IntroViewController()。 - animated:換頁動作是否加上過場動畫,填
true的話會由下向上滑出新的頁面,填false則是直接替換畫面。 - completion:切換頁面完成後執行的動作,這邊是一個閉包( closure ),你可以在裡面加上自定義的程式。
退出頁面
接著看到IntroViewController.swift,一樣是加上一個 UILabel 及一個 UIButton,這個按鈕則是用來退出頁面,程式碼與前述類似,這邊就略過。主要看到按下退出頁面按鈕後執行的動作,在IntroViewController內加上方法,如下:
func goBack() {
    self.dismissViewControllerAnimated(true, completion:nil)
}
上述程式可以看到要退出頁面,是使用self的方法dismissViewControllerAnimated(flag:, completion:),參數分別如下:
- flag:換頁動作是否加上過場動畫,填
true的話會由上向下退出頁面,填false則是直接替換畫面。 - completion:切換頁面完成後執行的動作,這邊是一個閉包( closure ),你可以在裡面加上自定義的程式。
Article 要進到 Article Detail 也是如前述一樣的方式,這邊就省略,完整內容請參考範例程式碼。
頁面開啟退出的過程
這節還要介紹一個功能,就是在頁面開啟及退出的各個階段,你都可以加入自定義的程式,在首頁ViewController裡面你可以看到如下幾個方法:
override func viewWillAppear(animated: Bool) {
    super.viewWillAppear(animated)

    print("viewWillAppear")
}

override func viewDidAppear(animated: Bool) {
    super.viewDidAppear(animated)

    print("viewDidAppear")
}

override func viewWillDisappear(animated: Bool) {
    super.viewWillDisappear(animated)

    print("viewWillDisappear")
}

override func viewDidDisappear(animated: Bool) {
    super.viewDidDisappear(animated)

    print("viewDidDisappear")
}
這些方法加上一開始的viewDidLoad()分別會在不同階段執行,執行的順序如下:
- viewDidLoad():最先被執行,時間點在 View 被載入時,不論切換退出這個頁面幾次,一個頁面只會執行一次
viewDidLoad()。 - viewWillAppear():在
viewDidLoad()之後被執行,時間點在 View 要被呈現前,每次切換到這個頁面時都會執行。 - viewDidAppear():在
viewWillAppear()之後被執行,時間點在 View 呈現後,每次切換到這個頁面時都會執行。 - viewWillDisappear():執行的時間點在 View 要結束前,每次要切換到別頁或是退出這個頁面時都會執行。
- viewDidDisappear():執行的時間點在 View 完全結束後,每次要切換到別頁或是退出這個頁面時都會執行。
以上方法可以依照需求寫入不同的程式。例如,如果每次進入一個頁面都需要更新資訊,那這個更新資訊的動作就應該放在viewWillAppear()裡而不是viewDidLoad()內。
以上即為本節範例的內容。
範例
本節範例程式碼放在 uikit/multipages